This is my first of many blog posts where I will discuss Tips & Tricks. This is related to my goal to provide valuable bite sized chunks of useful hands-on information to those who are using ShipConstructor.
If you have a topic you want me to discuss, you can email me or ask me via the various other channels: AUGI Marine, Twitter, Google+, LinkedIn. Even if you are not a subscription user or a current ShipConstructor user, if the question will benefit our community, I will attempt to answer it.
My first topic will be about how to create a detail view within ShipConstructor. It is pretty common to call out details within your project production documentation. I decided to create this post because a few months ago I saw a particular client’s production package which had more than the usual amount of detailing you would expect on a typical package. I asked them if they could show me how they create these details as I would have assumed that they would have a pretty slick way of creating these details since there were so many.
To my surprise, they did it manually. The amount of time to create each view was in the minutes. If I multiplied the time it took to do one by all the detail views they created in just one package we were talking many man hours.
I decided that I would show them how they could automate it within ShipConstructor. After 20ish minutes I created a command which would create a detail view in seconds. There was still some adjustment required but it was minimal. In this scenario I was not able to use AutoCAD Mechanical’s detail view command because they were using plain AutoCAD, as well as AutoCAD’s VIEWBASE command did not give us the required output.
I resorted to scripting the commands and then encapsulating the script in a custom command using AutoCAD’s CUI editor. I could have used lisp but I really did not need to in this case; also my lisp skills are not as good as they use to be. I was able to use some features from AutoCAD Express tools which was luckily already installed. If you do not have AutoCAD Express tools you should make sure you install it.
The workflow
- Run the new streamlined command
- Select the center of the object you want to detail
- Pick the radius of the detail source view
- I used a circle as my detail window but you could use any other shape
- Pick the same point as in step 2.
- Yes this is a little like a recipe 😉
- Select the viewport which the main item you are detailing is contained in
- This is where I use the AutoCAD express command VPSYNC
- Select the detail view which was created
- I created the detailed view to be 5x the original view. This can easily be changed
- Press enter
- Select where you want the detail view to be moved to
It is a bit of a recipe and something which can be improved on, but with only twenty minutes, I think this was a huge improvement.
Steps to create the streamlined command
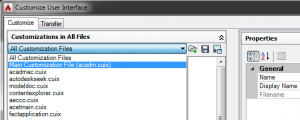
- Open the CUI editor by running command CUI
- Select the acad.cui or acadm.cui customization file
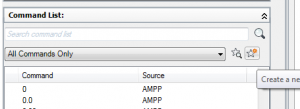
- In the CUI editor click the Create a New Command button in the Command List section. It can take a long time to load.
- In the Properties:Command:Name field enter the name you want to call your command
- In the Properties:Command:Command Display Name enter the display name (spaces are allowed)
- In the Properties:Command:Macro select the … button
- Enter the code in the Source Code section of this post
- Optional: Select an icon for the Properties:Images:Large image and Properties:Images:Small image
- Should look similar to below image
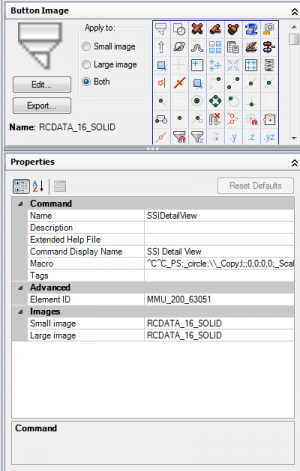
- Should look similar to below image
- Create new Panel by right clicking on the Ribbon:Panels icon and selecting New Panel.
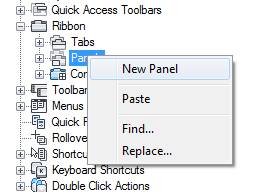
- Name it appropriately
- Find the command you created and drag it to the Row 1 child of the newly created Panel
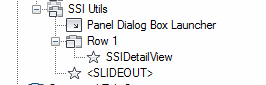
- Click and drag the new Panel to an appropriate Tab


The source code
^C^C_PS;_circle;\\_Copy;l;;0,0;0,0;_Scale;l;;\5;_mview;o;l;_VPSYNC;\l;_MS;_Zoom;s;5x;_PS;_Move;\\