Automating our current activities is the easiest way to improve the way we use our time and become more efficient. It does not require any additional education. Neither does it require implementing any new processes or Standard Operating Procedures. Just recently I was asked what is the best way to automate the generation of several Navisworks models which are used for different purposes throughout the organization. The request came requiring 6 specific Navisworks models that all referenced the exact same project but needed different information to be visually communicated depending on who was to consume it. This approach of having multiple Navisworks models for the same project is considered our best practice which is why I thought I would write a blog post and provide all the necessary setup you need to create multiple Navisworks models with a single double click.
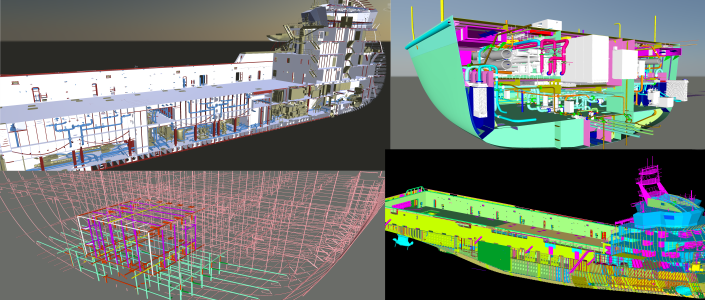
In the below examples I am automatically creating 4 different Navisworks models. These are just some examples but there is a virtually infinite amount of combinations you could create such as:
- Model of only parts that have changed in the last week
- Model used to visually identify what has been installed
- Model with certain compartments removed to protect IP when sharing model
- Model with ShipConstructor information stripped out to protect IP
- Model to be used as a 4D simulation of the assembly sequence
- Models combining files from other CAD applications or just pure native AutoCAD
Included in this post
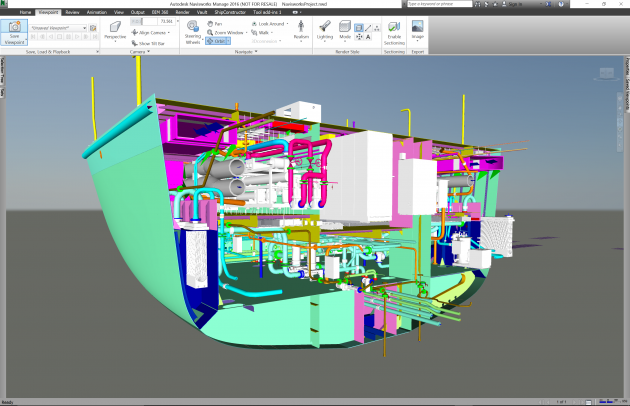
Management Only
A virtual model is key for management or department leads to see progress of the project. However, in some cases the view that you want to provide to management is not the raw work in progress model but some “clean” version of it.
There are several ways to create this management friendly Navisworks model. One of the easiest ways is to have a production drawing which is only updated with the current work in progress when it is determined appropriate and then cleaned up.
In the example I provide below I am using Product Hierarchy drawings as my clean version.
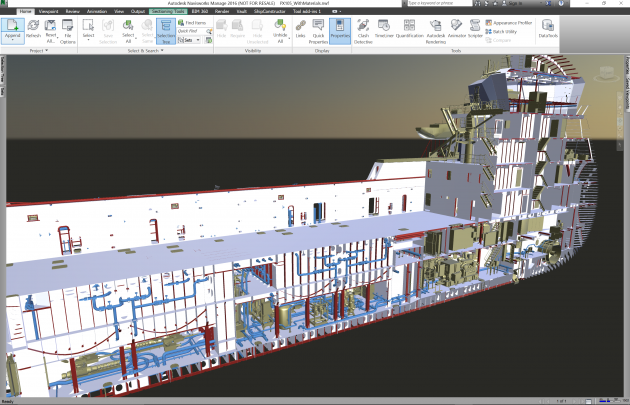
Engineering – Entire Project
This is the most obvious and what the majority of companies are, or should, be doing. The Navisworks model created in this version will be linked to the source ShipConstructor drawings allowing any designer to be able to select a part in Navisworks and switch to the ShipConstructor drawing automatically.
I use PublisherLT to allow me to generate this model and ensure all my parts are visible as well as have the drawing options that I want (solids, bevels, no marking text, no flow direction, no free ends, etc.)
Welds

Visually seeing the welds in Navisworks provides so much value to ensure all welds have been applied with the correct standard. It also is used to visually see progress of the production of welds on the shop floor.
A separate Navisworks model is created in the example which can be combined with any other Navisworks model if required.
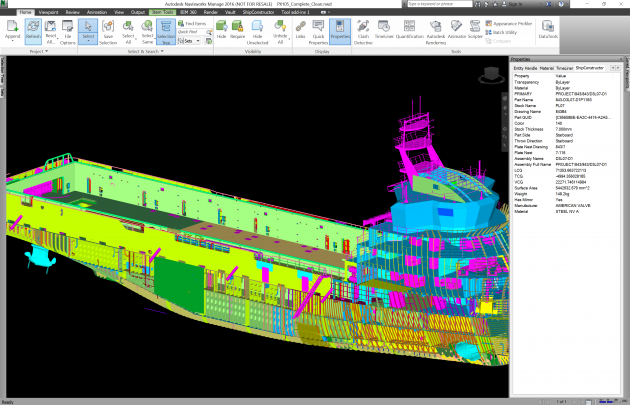
Engineering – Per Unit/Zone/Person
It is often that you or a specific designer will require only a subset of the entire project. This can be a specific unit or grand block, a combination of systems, or a model for each person of the area they are currently working in. The possibilities are endless.
In this example I have created a Navisworks Model per Unit.
Naviswork Batch Utility Vs. PublisherLT
I know there are some of you who use Navisworks Batch Utility to generate your Navisworks models and even though it is a very powerful and useful tool there are some limitations which is why I decided not to use it. The main reason is that by using PublisherLT I am able to set up the files the way I want them before generating the Navisworks model automatically. I can ensure all parts are unhidden, or specific layers are on/off or even change the display options of parts to get the solid and bevel representation. All this setup is configured in the PublisherLT operation so I never need to worry about doing any pre-setup.
How To Get Started
For those who do not have access to YouTube you can access the videos here.
If you do not have an SSI Nexus account signup for free here
Step 1: Extract and Copy Files
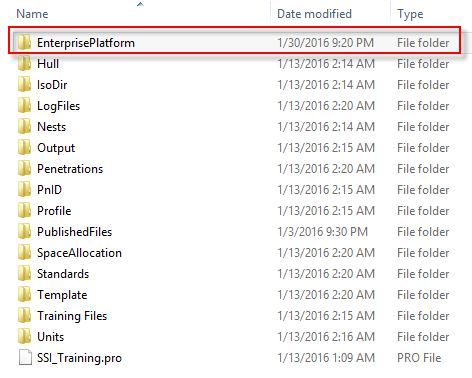
Extract the package provided at the bottom of the post and copy the EnterprisePlatform folder under your root folder of your project.
Step 2 : Edit Bat files
I have created a batch (.bat) file that will execute PublisherLT with all the correct parameters. This means it is easy for anyone to initiate the generation of the files by simply double clicking on the .bat file. You can also use Windows Scheduler to schedule the generation of these files throughout the day or the end of the day. http://windows.microsoft.com/en-ca/windows/schedule-task#1TC=windows-7
You will need to edit each of the .bat files under the EnterprisePlatform\Automation\ folder. You will need to change items highlighted below with the properties of your project.
Note:
- The pro file needs to have the extension of “.pro”
- The project path needs to end with a ‘\’
SET ProjectPROName= SSI_Training.pro
SET ProjectPath= E:\ShipConstructor Projects\SSI\Training\
SET UserName=Denis
SET Password=
SET UseIntegrated=YES
SET PublisherLT_EXE=C:\Program Files\SSI\ShipConstructor 2016 R2\arx_13\PublisherLT.exe
Edit Unit Load Criteria
Since each one of you will have different unit names for your project you will be required to change the unit names load criteria so that the automatic generation finds the drawings within a unit in your project. You will need to edit files LoadAllDrawingsInU01.xml and LoadAllDrawingsInU02.xml and enter the correct units names.
You can change the file names and add more units since your project will have many more units; however, you will also need to edit the file Waveform_NavisworksWorkpackage.bat to reference the new file names.
For the first test I would just edit the contents (not the file name) of LoadAllDrawingsInU01.xml and LoadAllDrawingsInU02.xml by changing the highlight section to a unit name in your project.
<LoadCriteria>
<Drawings>
<FilterUnits>
<Unit>U02</Unit>
</FilterUnits>
</Drawings>
</LoadCriteria>
Copy Operations files
I have added an EnterprisePlatform 2016 R2 operation file which contains several operations I use to generate Navisworks models. If you have not customized your operations.xml file, then you can simply copy the operations.xml file in the provided package to C:\Users\USERNAME\AppData\Roaming\SSI\EnterprisePlatform 2016 R2\
If you have edited your operations.xml file, you can open the one I provided and copy all the operations which are prefixed with “waveform.”
Generate Navisworks Models
After the above is set up your project is ready to have Navisworks models generated with a click of an icon. If you double-click the Waveform_NavisworksWorkpackage.bat then the process will start and depending on your project can take 20min to 8 hours.
The process I used is not really optimized since I had to make it general to work for the majority of my readers’ projects. However, the process can take significantly less time by parallelizing some of the tasks. If you are interested in improving performance for your specific use case, I would be happy to help you out.
Output: Navisworks Models
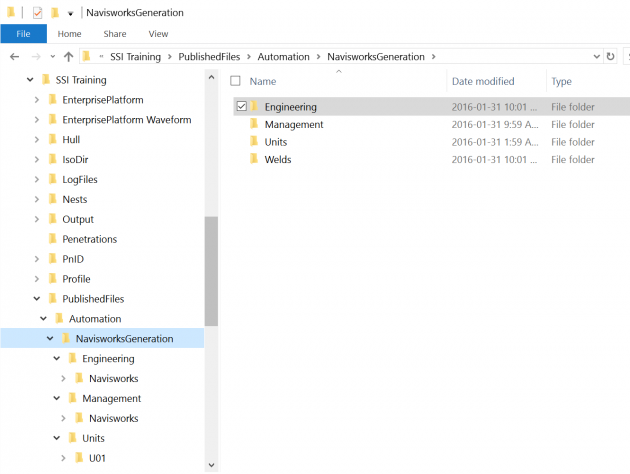
The Navisworks files generated are placed in the PublishedFiles folder under your projects root directory. This can be changed to any location which you have access to. It is common that the files will be generated to different network locations for different stakeholders.
Supporting Files
Download the files here.
If you do not have an SSI Nexus account signup for free here
Post Comments
Good info. I find that I use the timeliner a great deal for the production side.
The timeliner is a great tool. I use it often to get a better idea of peoples build sequence. I suspect you watched the timeliner video on post: http://bit.ly/1vSJhvs?
Thanks for sharing. Impressive using the Product Hierarchy to generate the schedule and having the ability to map it in Navis. Definitely a time saver
Very interesting post. Thank you. Enjoyed it.