
This is part 2 of my blog series Solution for a distributed team using disparate authoring tools. In my previous post I talked about the overall strategy and tools I will use to solve a more common challenge we are facing in our industry of leveraging a multi-tool and non-collocated workforce.
In this post I will discuss how to create, update and manage the combined product model.
Adding users and setting permissions
The first step will be to add users who will have access to the project as well as to set their permissions. This is a relatively simple process.
Controlling permissions is very important in a distributed environment because you want to ensure only the designated personnel can make modifications but still allow specific stakeholder to have the capability to view and interrogate the project.
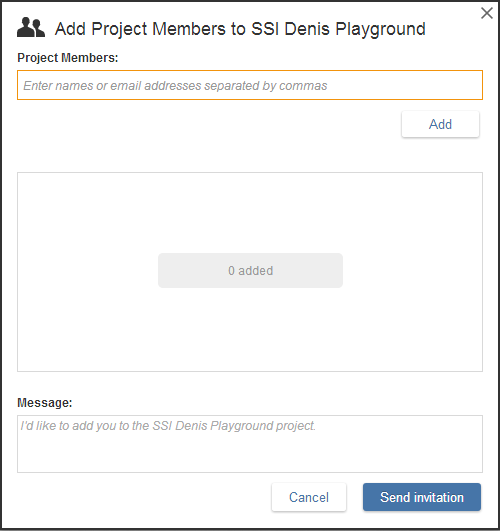
To add users you will require each user’s email address. After you add them to the project they will get a notification via email and instructions as to how to access the project. Once a user is added to the project they will now be able to access the model in any of the three methods:
- Navisworks
- BIM 360 Glue Web App
- BIM 360 Glue iPad App
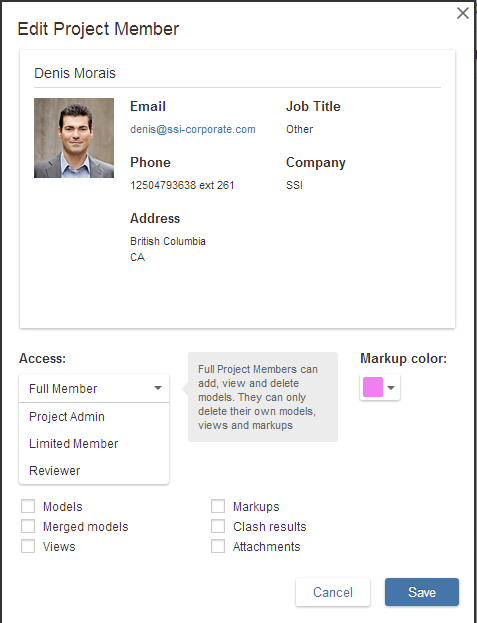
Once a user is added you can manage their access to the project as well as set when they will be notified when the model changes.
Uploading your first model
There are two main ways of uploading your first model.
Navisworks
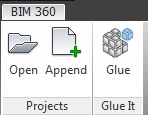
Navisworks has a BIM 360 Glue plug-in that will allow you to upload models from within Navisworks. If you go to the BIM 360 tab and click Glue it will take you through a relatively simple process to upload your Navisworks model.
BIM 360 Web App
The method I mostly use is through the BIM 360 Glue Web App. This strategy is the most robust because it does not require Navisworks. As I mentioned in my previous post, BIM 360 supports over 50 file types and you can simply drag them into the Web App to upload them even if you do not have the source authoring tool installed on your computer. If one of the sites does not have Navisworks but has the model in one of the 50+ supporting formats such as AVEVA PDMS (.RVM), Intergraph, Bentley (DGN), CATIA, SolidWorks, JT, STEP, IGES and obviously AutoCAD (.DWG), they can upload the native files without any additional conversion.
Merging or Gluing the models
With both of the models added it is now time to combine the models to view and interact with them as if they are one. This is where BIM 360 Glue excels.
In BIM 360 Glue there are two types of models:

The models which are uploaded and managed by each site are displayed here. If you need to view them separately, this is where it can be done.
Each site will be responsible for there own model. When either site has an updated version of the model they will udate the model they own. Stakeholders with the appropriate permissions can view models added by anyone.

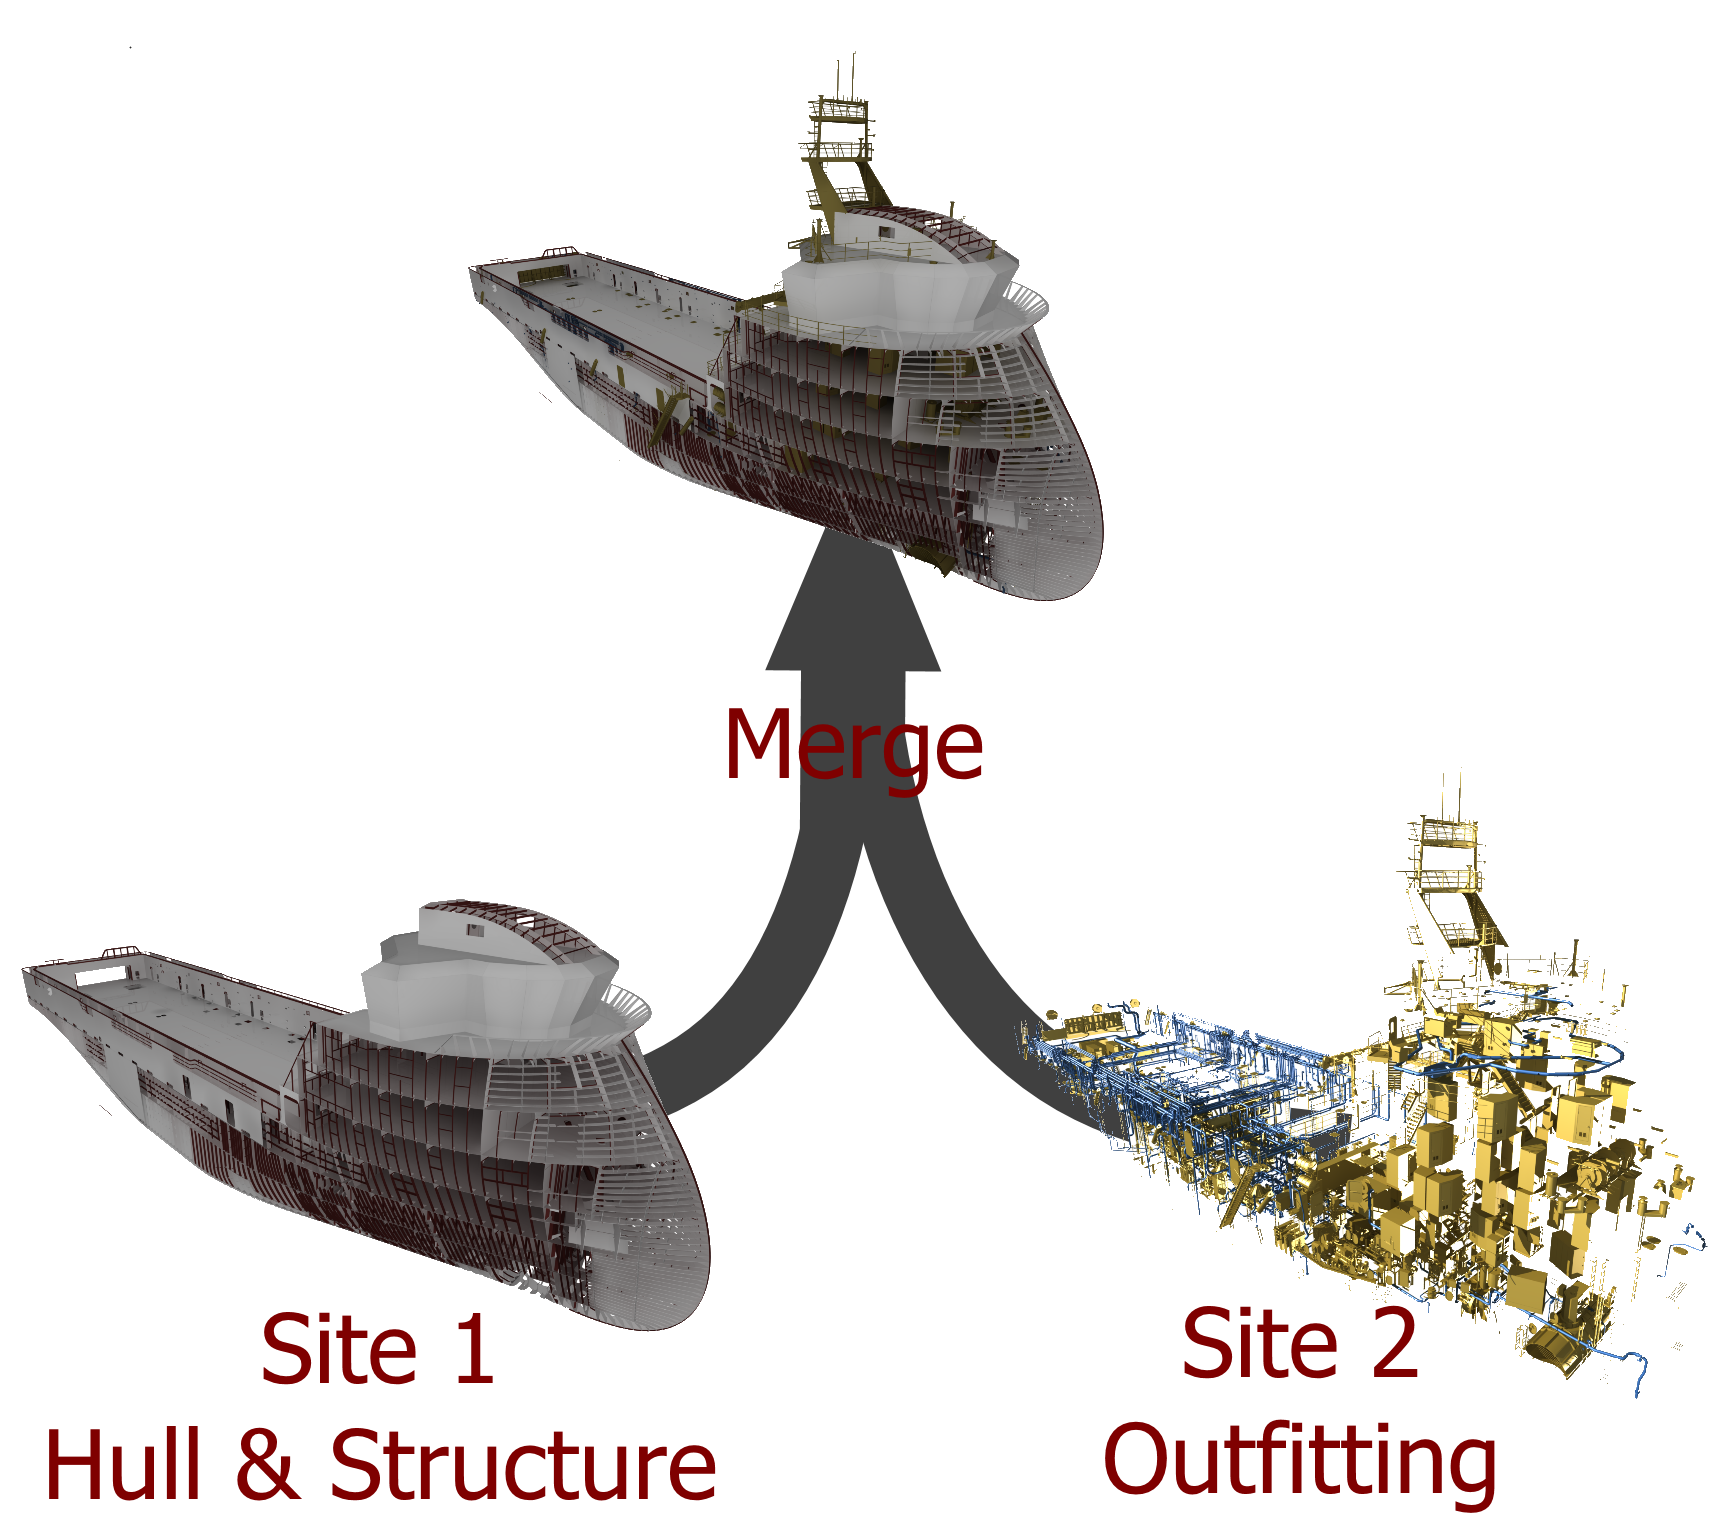
Merged Models is not a new model but rather a combination of several models added in Models. The merged models allow you to combine multiple models to view them as one model. In our example it will allow us to combine the Hull & Structure model with the Outfitting model, this will allow us to view and interact with the combined models as a whole. We will also be able to perform actions on the combined (merged) model such as clash and interferences.
The merge model references the models (does not copy them) so there is no need to update the merged models. The merged model will automatically reflect the updated models while keeping all the information and history of the actions done on the merge model. This includes all comments, markups, views and clashes.
The models is where each site will add and maintain their latest version of their model while the Merged Models is where each site will use to view the entire project model.
Updating the model
A key aspect to this strategy is that each site is responsible for their own data. What this means is that when a new model is ready to be shared with the other stakeholder they will need to update the model in BIM 360 Glue.
Depending on your notification settings each user can get a notification that the model is updated. This does remove the extra step of notifying the other site that there is a new model ready for them to view.
The Merged model does not need to be updated as it just represents the combination of the two models. Once a model is updated the Merged Model will automatically reflect the changes.
Video demonstrating above workflows
Posts in this Series
Part I: Overview of BIM 360 Strategy
Part II: Create, update and manage the combined product model.
Part IV: Communicate and collaborate synchronously and asynchronously with all team members
Part V: Detect and manage clashes and interferences in combined model.